Hiển thị các bài đăng có nhãn Product Reviews. Hiển thị tất cả bài đăng

Thứ Tư, 24 tháng 2, 2016

Product Review: 2016 45NRTH Wölvhammer Winter Cycling Boot


45NRTH introduced its newly redesigned Wölvhammer Winter cycling boot for 2016 late last Fall and the changes they made were a huge improvement on previous models.  Anyone who had a pair of these older models knew the problems with them such as sticky zippers and difficulty getting them on and off due to their double layer boot design.  Gone are all of those problems with this new single layer boot construction.  The outside of the boot now has a full grain leather and Ballistic Nylon Cordura shell for warmth and durability giving it the look and styling of a traditional mountaineering boot.

One of the first things I noticed is the improved Power Strap at the top of the boot, gone is the restrictive D-ring of the older style.  This will make putting them on easier and allow adjustments to be made while wearing gloves.  The lace-up design with gusseted tongue makes it easy to get the right amount of comfort when putting them on and it keeps the snow and slush out while keeping the warmth in.  The lacing has a Velcro tab on the end that can be tucked underneath the Power Strap so it is out of the way and secure.


With this new gusseted tongue, getting into them is easy.  It's just like putting on a traditional Winter boot.  This is especially handy when wearing thicker wool socks for colder temperatures.


The deep lug pattern Vibram sole provides plenty of traction for those times when you have to hike-a-bike or put a foot down to keep yourself upright.  This new model is two-bolt SPD compatible only but comes with a cleat plug giving it the versatility to be used with flat pedals too.


Where I found these boots really excelled for warmth was in the late Fall and early Winter when temperatures were in the twenties and thirties.  I was able to wear a thin wool sock and be warm and comfortable for hours out on my fatbike.  The wicking properties of the wool socks and the lining of the Wölvhammers kept my feet dry even when I became a little overheated.


My toes tend to get cold easily so when temperatures dipped into the teens and below I would use chemical toe warmers and thicker wool socks to extend the length of my rides.  The larger toe box on the new Wölvhammers still left me with plenty of wiggle room to keep blood circulating properly, even when wearing the thicker socks and toe warmers. 


For really cold temperatures I would pair them with the 45NRTH Bergraven Gaiters to add an extra layer of insulation over the boot and keep the snow out for those first tracks and bushwhacking rides in deeper snow.


During the Winter I will clip in (using Crank Brothers Eggbeater 3's) about 75% of the time.  The times I don't and use flat pinned pedals are during icy conditions, doing a little bushwhacking or on rare occasions like downhill (Fat Bike Gravity Fest).  The Vibram sole of the Wölvhammers really works well with flats providing plenty of grip on the pins of the pedals.

Wölvhammers  keep my feet dry during wet conditions or creek crossings where shoe covers with MTB shoes don't.  Because they are breathable and keep moisture out, I plan on using them through the Spring thaw on some of my cold weather gravel rides on the fatbike.


The real test for the Wölvhammers came back in mid January when temperatures got really cold here in the Twin Cities.  Some friends and I decided to go out early one Sunday morning for a creek/bushwhacking ride through the Minnesota River Bottoms.  At ride start the temperature was -14° F and after 2-3/4 hours it had warmed up to -6° F.  I had used chemical toe warmers and thick wool socks for this ride and by keeping my core temperature up with constant movement the Wölvhammers kept my feet warm but my toes were beginning to get a little cold near the end.


In conclusion, 45NRTH Wölvhammer boots are an excellent choice for both clipless and flat pedals in the Winter.  Their comfort rating is 0° F to 25° F and in these conditions they work quite well at keeping feet warm and dry.  Everyone is different so sock choice and chemical warmers will definitely help those who's feet get cold easily.  These boots are very comfortable and don't seem bulky like other non-cycling specific boots.  The new design is a huge improvement over the older models and has become much more user friendly.  For those that race ultras or ride many miles in extreme temperatures the Wölvhammer may not keep your feet warm during these extended periods of a sub-zero climate.  For this reason 45NRTH spent several years developing the ultimate extreme cold weather boot, the Wølfgar with its comfort rating of -25° F to 10° F.  But for most of us recreational and enthusiast riders, the Wölvhammer does a fine job.

45NRTH Wölvhammer boots are now available in Mens extra wide 38–50 (no size 49), full sizes only at Penn Cycle and other fine bike shops for $325.

Disclosure:  45NRTH provided the review samples for this article, but offered no other form of compensation for this review.

Thứ Năm, 29 tháng 10, 2015

Product Review: CatEye Strada Smart Package

CatEye Strada Smart Package

CatEye introduced the Strada Smart late last year as a cycling computer that connects to your smartphone with the CatEye Cycling App (iPhone & Android) and also to optional Bluetooth Smart sensors.  With the Strada Smart mounted on the bars a smartphone can be safely tucked away in a pocket or bag while recording your ride data. 


There are two modes that can be used while riding, Mirror Mode and Sensor Direct Mode.  Mirror Mode uses ride data from the smartphone with the CatEye Cycling App and transmits it to the Strada Smart.  Gps from the smartphone records speed, distance and altitude.  Email, text messages and calls from the smartphone are displayed as alerts on the Strada Smart when in mirror mode.  Optional Bluetooth Smart sensors can also be used in this mode to record and display cadence, heart rate and power.


Display data on the Strada Smart in Sensor Direct Mode using optional Bluetooth Smart speed/cadence, heart rate and power sensors without the use of a smartphone.


Now that you know how the Strada Smart works, I can share my user experiences with you.  I have had a lot of time and many miles of rides to thoroughly test this product out and one of my favorite applications for the Strada Smart was using it on my fatbike in Mirror Mode.  I could have bike computer ride stats in real time without having a sensor/magnet mounted.  Sometimes spacing from the fork to the spokes can be an issue using standard bike computers for speed and distance. Since the Strada Smart is  paired with my smartphone no sensors are needed.  Speed and distance stats are displayed as well as avg. speed, max speed and elapsed time.

The Strada Smart is easy to read and the alert features are a nice addition when paired with a smartphone.  It would display an icon when I was receiving a call, had text message or new email.  This allowed me to know someone was trying to get in touch with me while I was riding and I could call them back or reply to their text at my next stop.  When connected to a smartphone or optional sensors, an icon displays that connection.  Notice it is connected to a speed/cadence sensor and a smartphone in the picture.


I set up the speed/cadence sensor on my gravel bike which allowed me to use the Strada Smart with or without my smartphone.  Pairing was easy and the connection without using a smartphone was good.  I did however have some problems losing the connection between the speed/cadence sensor and the Strada Smart during longer breaks or pauses during a ride.  Paring the speed/cadence sensor and the Strada Smart with my smartphone using the CatEye Cycling App was also very easy and took no time at all.


The CatEye Cycling app has a nice layout of ride data summaries including a ride map, ride statistics and a graph containing altitude, speed and heart rate or cadence (when those sensors are used).

Uploading your ride activities is quick and easy.  When using the app select the finish flag icon at the end of recording a ride and a Save & Upload screen appears to name the ride.  Then upload to your Strava, CatEye Atlas or TrainingPeaks account by selecting the Save & Upload icon.  Facebook and Twitter sharing is also available on this screen.


I have really come to like the functionality of the Strada Smart on both my fatbike (without speed/cadence sensor) and commuter/gravel bike (with speed/cadence sensor).  It is now standard equipment on all of my rides and works flawlessly with the CatEye Cycling app on my smartphone.  With its Bluetooth Smart connection from smartphone to computer, battery drain is relatively small.   

The Strada Smart is compatible with the iPhone 6, 6 Plus, 5S, 5C and 5 running iOS 8.0-8.4 and 9.  For Android phones running Android 4.4 or above and Bluetooth 4.0 check the Cateye Cycling Recommended Devices page for compatibility.  I used the Strada Smart Package with a Galaxy S4 (Android 4.4) and a Galaxy S6 (Android 5.1) for testing without any compatibility problems.

The CatEye Strada is available in several package options, the Strada Smart for $80, Strada Smart Package  (speed/cadence sensor) for $140 and Strada Smart Bundle (speed/cadence & heart rate sensors) for $210 from Penn Cycle and other fine bike shops.

Disclosure:  RP Active Sports on behalf of CatEye Co. LTD provided the review sample to me at a reduced price for this article, but offered no other form of compensation for this review.

Thứ Ba, 25 tháng 8, 2015

GeigerRig Introduces Nano Technology to Their Pressurized Hydration Pack Engine


I was first introduced to GeigerRig's pressurized hydration packs two years ago at Interbike during a demonstration of how their Hydration Pack Engine works.  I wanted to put one of their hydration packs to the test and see how it performed so I contacted them and they sent me one to review.  I used it for an entire Summer on numerous gravel rides/races, mountain biking and commuting to work before writing my review.

Their pressurized Hydration Pack Engine, plug and play connectivity, ease of cleaning and quality of the pack itself made it the only hydration pack that I continue to use.  When I was contacted by GeigerRig earlier this year about trying their new Nano Technology (Nano Drink Tube) I was very interested in doing so.

The short video below explains how GeigerRig Nano Technology works.


I received a GeigerRig Lightweight Rig hydration pack made with Heavy Duty 840 Ballistic Nylon, the new Nano Drink Tube and a 2L Hydration Pack Engine.   The small size of the Rig pack would turn out to be a perfect choice for gravel racing and mountain bike rides for hydration only and not carrying gear.  The Rig is big enough however to hold the 70 oz. Hydration Pack Engine and some energy snacks for the ride.  The plug and play connections on the Hydration Pack Engine and the Nano Drink Tube had me ready to use the pack in no time.


The Nano Drink Tube is one-third the diameter of standard drink tubes at only 4mm.  Because the Hydration Pack Engine is pressurized, this tiny tube has the ability to deliver fluid at a fast rate.  There is no control flow on the end valve (shown above) but it does have a Flow-control gate (shown below) that can be positioned anywhere along the tube for easy reach.  This Flow-control gate allows open flow, moderate flow and a drip setting depending on which I prefer.  


The tube is easily routed to a desired position making it perfect for biking.  The Poplock locking clip helps keep the tube in place by attaching to clothing or pack straps.  Once the pack is pressurized with a few pumps of the Power Bulb I'm ready to put the end valve in between my cheek and gum and set the Flow-control gate to the desired flow rate.


The end valve is small along with the tube so talking and breathing while using it is not a problem.  I like the flexibility of the Flow-control gate where I control the fluid rate.  Usually on hot days I will set it at a drip or moderate flow that keeps me hydrated without having to think about it.  During a break in the ride or when I need more fluids I will adjust to an open flow until my thirst is quenched.  When not in use I will simply tuck the tube end under the shoulder strap connector so I can quickly grab it when I need to hydrate.

GeigerRig's pressurized hydration system pack with the Nano Drink Tube keeps me hydrated throughout the ride.  With the flexibility of the flow rate, I just ride and get the right amount of fluids I need. 

The GeigerRig Rig Hydration Pack, Hydration Pack Engine and Nano Drink Tube are available on the Geigerrig website and at select dealers

Disclosure:  GeigerRig provided the review samples for this article, but offered no other form of compensation for this review.

Thứ Hai, 29 tháng 6, 2015

Product Review: BackBottle

From Fix It Sticks creator Brian Davis comes the BackBottle, an innovative new design for the water bottle with a unique shape that cyclists will come to love.  It's not your standard bottle, but one that was carefully thought out and designed with an ergonomic shape that fits perfect in a jersey pocket.  After a successful KickStarter campaign that achieved its goal weeks before the deadline, the BackBottle is now available.
  
"The BackBottle combines a bottle and a hydration pack into one small, portable package.  Last year I went on lots of long rides and was constantly having to adjust my route for gas stations and stops in a three hour ride.  I had the idea then, but the tipping point was at a cyclocross race when I was told no hand ups were allowed, even for water. With no cages on my cross bike, I got to work.”- Brian Davis


The shape of this bottle is the key that makes it so user-friendly.  I have used a standard cylindrical  water bottle in my jersey pockets before and spent time fumbling with trying to get it back into the pocket after taking a drink.  This is not a problem with the BackBottle.  The sloped pointed bottom makes it easy to slip back into my pocket in one smooth motion.  The BackBottles's flat back with raised ribs for air flow keeps it from rolling and feeling uncomfortable against my back.  After a little while I didn't even notice it was in my jersey pocket.


One design feature I really like about the BackBottle is the raised portion with lip that is on the lower half of the bottle.  This lip sits just below the jersey pocket seam to prevent it from being ejected while riding rough terrain.  I have done a lot of mountain biking and riding gravel with the BackBottle and it simply stays put, I have never lost one and had to double back to pick it up. 


The wide opening is easy to put ice cubes into but the cap could use a redesign.  When the Backbottle is filled with liquid it won't stand up like a traditional water bottle so it must be laid on its side resulting in a small amount of water slowly leaking from the nozzle.  Other than this the BackBottle is a great design that works as intended.  I use a pair of them in my jersey pockets for times when a hydration pack may be more than I need for a ride or one as a backup for those long rides with a hydration pack.  Cyclists that don't like to wear a hydration pack, don't have bottle cages or race road, mtb or cross will really like this product. 

Specifications
  • 18 ounces of capacity (.53L or 530mL +/-) 
  • 3 ounces in weight when empty 
  • 8.5 inches long and 3 inches wide 
  • 53mm diameter opening (easy to add ice) wedged and ergonomic for easy one-hand operation manufactured from squeezable LDPE plastic made from recyclable components (packaging #3, bottle #4, cap #5) 
  • 100% BPA free 100% 
  • Made in the USA 
  • flat back minimizes roll when climbing or sprinting raised ribs on the flat back allow airflow 
  • top-shelf dishwasher safe

The BackBottle is available from BackBottle.com for $12 and shipping is free for U.S. orders.   

Disclosure:  Fix It Sticks provided the review samples for this article, but offered no other form of compensation for this review.

Thứ Năm, 30 tháng 10, 2014

Product Review: Scosche boomBOTTLE


Scosche introduced the boomBOTTLE last year at Interbike and it caught my attention right away.  It's a rugged IPX4 Splashproof/Weatherproof Bluetooth connectivity speaker designed to fit in a water bottle cage or cupholder.  I liked the idea of the boomBOTTLE so much that I included it as one of the 20 products in my 4-part series of posts Interbike 2013 Cool Bike Gear.

Image Credit: Scosche Industries
First of all, let me go over some of the features of the boomBOTTLE.  As mentioned above, this speaker has IPX4 Splashproof/Weatherproof construction meaning it can withstand splashing water from any direction.  It's lightweight at less than 1 pound and has a shock absorbing non-slip exterior with dust and debris protective screens around the speakers.  Bluetooth connectivity gives it a wireless range of up to 33 feet and it has a 3.5mm auxiliary input for non-Bluetooth devices.  The dual 40mm drivers and passive subwoofer omni-directional speakers deliver sound 360°.  Control music playback with the multi-function button to pause, play and skip tracks.  Phone calls can be taken while riding using it as a speakerphone.  A long lasting Lithium polymer rechargeable battery provides up to 10 hours of use.


I enjoy listening to podcasts and music while I ride but the use of earbuds can interfere with me hearing approaching vehicles or passing cyclists.  The boomBOTTLE would be a safer alternative that would let me still hear the sounds around me while listening in on my favorite podcast.

I ride a lot of gravel roads so sand, dirt and mud do end up all over me and my bike on rainy days and wet conditions.  This I thought would be a good test of the boomBOTTLE's splashproof/weatherproof IPX4 rating.  Rides in the rain and on wet roads did not affect the performance of the boomBOTTLE and it continued to deliver a rich quality sound.  The slip-resistant outer coating and screens over the speakers protected it from the the water and debris flung at it from my wheels.

After these wet rides the boomBOTTLE was good and dirty and in need of a cleaning.  This was easy, I lightly rinsed it off under the faucet to remove all of the road muck it had picked up on the ride.  A quick wipe down with a dry towel and it was like new again.

The boomBOTTLE fit nice and snug in my water bottle cage and stayed put even on washboard gravel and bumpy "No Motorized Vehicles" doubletrack.  The battery life was exceptional giving me 10+ hours of playback on a single charge.  Using it 1 to 2 hours a day, a charge seemed to last the whole week.  When the battery status reached 25% a voice prompt stated "Battery Level 25%" letting me know it would soon need a recharge.  To protect the battery when the charge is too low it would beep three times, the power down tone would sound and it would shut down.  To conserve battery it would automatically shut down after 10 minutes when there was no longer a Bluetooth signal input.  Charging the battery does take some time, usually around 3 hours, but the long battery life definitely makes up for that.  The charging status LED let me know if it was charging (red) or had reached a full charge (blue) and was ready for use.


Pairing my phone with the boomBOTTLE for the first time was very easy and I was able to do so without reading the instructions.  Once paired, when turned on connection is almost immediate and a voice prompt will state "Power On" and "Connected".  The large buttons and placement of them made it easy to adjust the volume or pause and skip a track while riding.  When turning up the volume on the boomBOTTLE it would beep once when maximum volume was reached.  During windy conditions or when riding fast (16+ mph), maximum volume was needed to hear the audio over the wind noise and was sometimes hard to hear.  To overcome this, I recommend using a product like Wind-Blox to reduce the wind noise and give a better listening experience.  Don't get me wrong, the boomBottle is loud and has good bass with rich sound but wind noise across the ears can sometimes be even louder.  Another way to direct the sound from the omni-directional speakers to better hear the audio is to place the boomBOTTLE in a bottle cage on the down tube like pictured in the photo above.  This will better point the sound toward the rider than placement in a cage on the seat tube.


Integrated Music Controls (Multi-function button)

The multi-function button (MFB) located between the up/down volume buttons has many useful controls of the paired device.  A single tap of the MFB will play or pause an audio track, while a double tap will track forward and a triple tap will track backward.  To answer a phone call and use the boomBOTTLE as a speakerphone, tap the MFB once and do the same to hang up a call.  For phones that have voice control function, hold the MFB for two seconds and release and this will access the phone's voice control feature.  These integrated music controls work nicely when riding because they allow leaving the phone in a pocket and give the ability to control it with the touch of a button.

On the bike or around the house, this compact Bluetooth speaker delivers rich, clear and loud sound whether listening to music or spoken audio podcasts.  Using it is much safer than headphones or earbuds when riding my bike because I can still hear things around me like cars, pedestrians and other cyclists.  The battery life is great and the unit's construction is durable and water resistant for rides in any weather on the road or singletrack.  I would definitely recommend the boomBOTTLE to anyone that likes to listen to music or podcasts while riding their bike.  

The Scosche boomBOTTLE retails for $129.99 and is available in a variety of colors from Scosche, Amazon and many other online retailers.

*Note:  The Scosche boomBOTTLE was paired with a Samsung Galaxy S4 via Bluetooth the duration of testing for this review.

Disclosure:  Scosche Industries provided the review sample for this article, but offered no other form of compensation for this review.

Thứ Năm, 9 tháng 10, 2014

Product Reveiw: GeigerRig Rig 500 Ballistic

Staying hydrated while cycling, especially during long rides or hot weather, is very important and when I used water bottles I did not drink as much as I should have.  Taking my hands off the bars to grab the water bottle and drink was somewhat inconvenient especially when riding singletrack or hilly gravel roads.  This resulted in waiting until I was thirsty and gulping instead of continually sipping small amounts to remain hydrated.  A hydration pack definitely makes drinking during rides much easier and can be done while both hands are on the bars.

I first saw GeigerRig pressurized hydration packs and a demonstration of their Hydration Pack Engine at Interbike last year.  The pressurization feature and their durable Ballistic Nylon construction set GeigerRig's packs apart from traditional hydration packs.  Immediately I knew I wanted to try out one of their packs on my rides and see the difference for myself.  I needed a pack that was lightweight with enough storage for small items, maybe a jacket and had a 2L reservoir.  The Rig 500 seemed like the perfect fit.

 After receiving the Rig 500 from GeigerRig, I put it to the test on many gravel training rides, the Almanzo 100 and the Tour of Filmore, mountain biking on both the 29'er and fatbike and commuting to work (48 miles round-trip).  This was more than enough to get a feel for the performance of this pack.

Image Credit: Kristin Clark

I'll start with the pack itself which is constructed of 100% Ballistic Nylon making it super durable.  I have ridden in the rain with clothing in this pack and the Ballistic Nylon, though not waterproof, kept my stored items dry because it doesn't absorb much water.  The Rig 500 pack is full of these useful features:
  • a pack handle for easy carrying when not wearing 
  • two adjustable buckled compression straps to hold pack contents tight and secure
  • two external pockets which are great for keys, snacks and other small items
  • industrial size 8 coil zippers
  • a sternum strap that is easily adjusted to help support the weight of the pack and to ensure proper fit, especially if loaded with gear
  • a removable hip belt, which I did not use but may come in handy for hiking
  • two zippered mesh pockets in the main compartment that have plenty of room for snacks, hats, gloves, spare tubes, socks, etc.
  • shoulder straps that provide an ergonomic fit and support the load of the pack comfortably
  • a bulb holder for the bulb pump located on the shoulder strap that is easily reached for quick pressurization or depressurization by turning the release valve at the top of the bulb
  • main compartment with 500 cubic inches of dry capacity for larger items like a jacket, I have even carried a full size bath towel for showering when commuting to work
  • storage compartment that holds the hydration engine (reservoir) securely in place without any movement or shifting
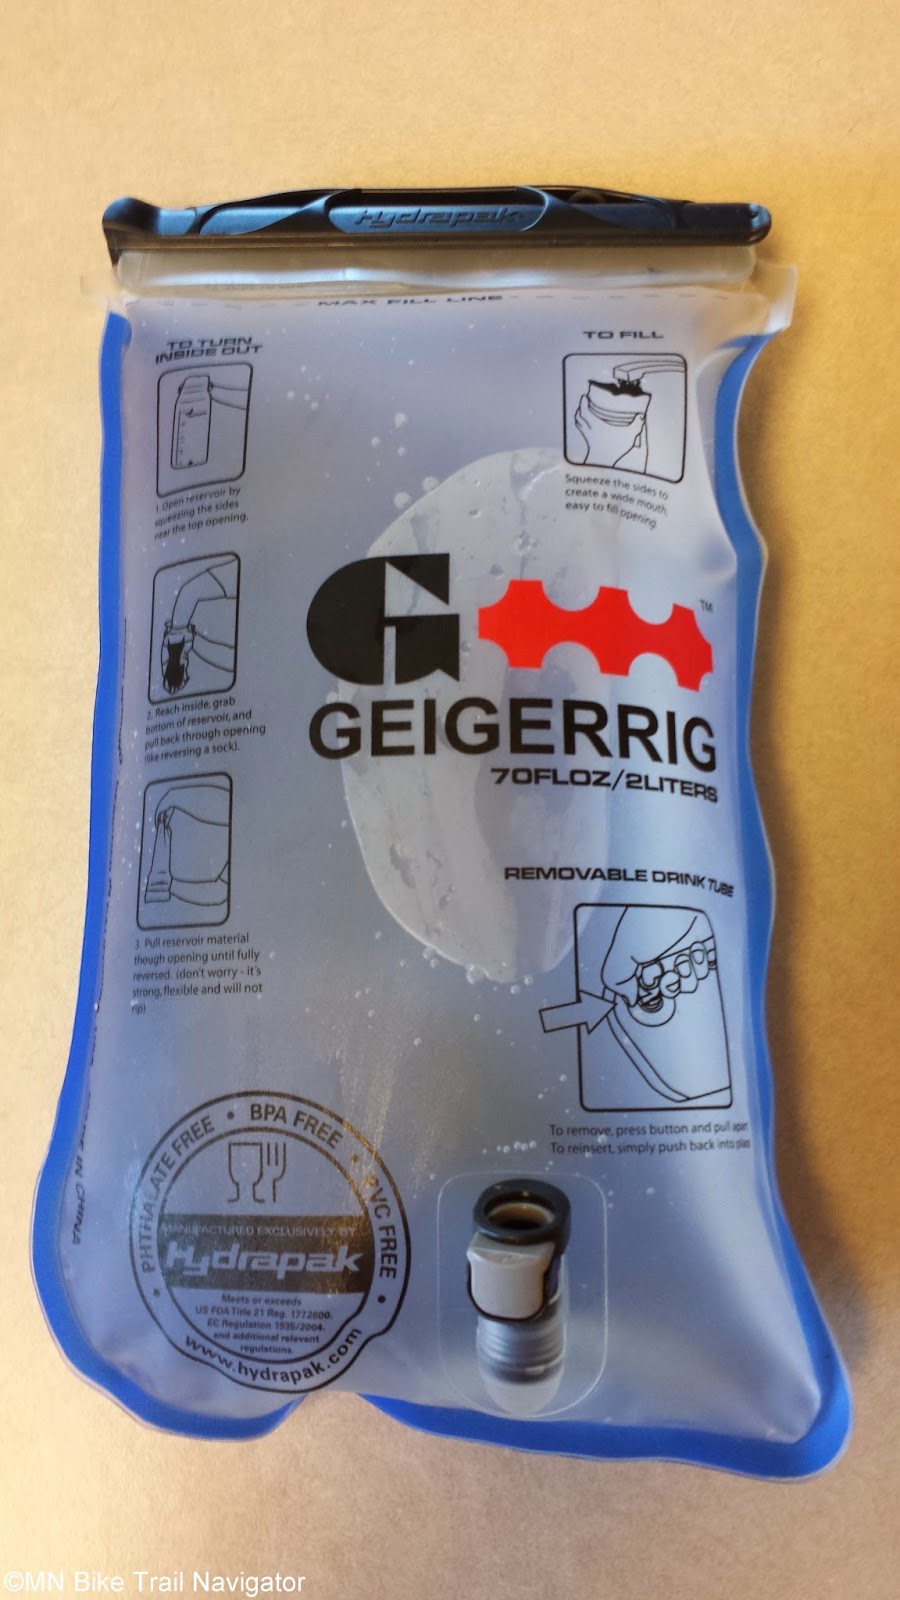
The 2L (70 oz) hydration engine (reservoir) has two compartments, one for air pressurization and another for water.  The quick release valves on the hydration engine do not leak and connect easily to the drink tube and the air tube that contains the bulb pump.  The top of the bladder has a slide seal that does not leak and a wide opening for easy filling with fluid and ice cubes. 


Once filled, connect the air and drink tubes and place into the hydration engine storage compartment in the pack and lightly pressurize using the bulb on the front of the shoulder strap.


I really enjoy using the Rig 500 for those hot summer days and long rides where I know I will need to bring enough water to stay hydrated.  I put it to the first real test on an all day ride at the Almanzo 100 back in May.  With the warm weather that day and all of the hill climbing that the Spring Valley countryside offered, I was glad I had it with me.  The most beneficial aspect of this hydration system was that I didn't have to suck to drink, all I had to do was bite down on the valve and water sprayed into my mouth.  This was a welcome feature when I was breathing heavily on big climbs and sprints.

The only problem I had with the Rig 500 was when the hydration engine was over-pressurized water flow would be cut off and I would have to turn the release valve on the top of the bulb pump to depressurize it restoring flow once again.  I am not sure if this was due to pinching of the water line or if it caused the quick release button at the connection to be pressed.  After a while I learned how to keep the pressure at an optimum level to not interfere with the flow.  Other than this, the Rig 500 worked perfectly and its size is just right for mountain biking and riding long distance gravel.  It had plenty of pockets and room for the things I needed to bring along for the ride.  The back pads of the pack have channels to provide some air flow but where the pack contacted my back sweating still did occur on warm days.  The shoulder straps are comfortable and the sternum strap helps support the weight of the pack more evenly.

Cleaning the hydration engine was very easy.  The bladder can be turned inside out and placed on the top rack of the dishwasher or washed by hand.  Afterward it can be set out to dry.  The drink tube can be pulled out of the pack to rinse but I usually just leave it in while resting the pack next to sink and putting the bladder connection end under the faucet squeezing the bite valve to allow flow through the tube.


After many rides I have come to rely on this high quality pack/reservoir combo.  The Rig 500 has the storage space that I need without being to big or bulky and fits comfortably.  The hydration engine is convenient to fill, connect and clean but my favorite feature is the ability to pressurize it.  A pressurized reservoir helps me continuously hydrate while riding where I may not if just using water bottles.

The GeigerRig Rig 500 is available direct from GeigerRig for $135 and comes with a 30 day money-back guarantee.

Disclosure:  GeigerRig provided the review sample for this article, but offered no other form of compensation for this review.

Thứ Hai, 29 tháng 9, 2014

Product Review: Finish Line No Drip Chain Luber

Lubricating my bike's chain used to cause drips that either ended up on my garage floor or my wheels and chainstay.  After seeing the No Drip Chain Luber from Finish Line last year at Interbike I figured this may be a solution to that problem.  In theory it seemed like a good idea but how would it work with lubes of varying viscosity and would it coat the chain evenly without drips?  After receiving some of samples from Finish Line I decided to test it out and see if it would live up to its name.

The No Drip Chain Luber is simple in its design, it comes with an empty 2 oz. bottle, a unique applicator head, 3 wicking pads and a travel cap.

The two lubes I use most are at opposite ends of the spectrum in terms of viscosity.  ProGold Extreme is very thin while Chain-L is as thick as honey.  I would put the No Drip Chain Luber to the test and see how it would handle both of these lubes and maintain its No Drip claim.


I used the the ProGold Extreme on the 9:Zero:7 fatbike all last winter and was surprised how well it penetrated the rollers without the No Drip Chain Luber delivering too much thus dripping onto the floor.  A little squeeze and a couple of back pedal revolutions while the wicking pad was in contact with the top of the chain was all it took.  A quick wipe down on the side plates of the chain with a rag and I was ready to roll.


For my gravel bike I use Chain-L lube.  I like this lube because it lasts a long time and delivers a very quiet and shift responsive drivetrain.  This stuff is thick so I wanted to see if the No Drip Chain Luber would distribute it evenly onto the chain.  I squeezed the bottle upside down until the wicking pad was thoroughly soaked with the lube.


Now I was ready to lube the chain.  Lightly squeezing the bottle with the wicking pad in contact with the top of the chain, I began to slowly back pedal until lightly coated.  Because Chain-L is so thick I repeated this process on the bottom side of the chain and gave the lube time to work its way into the rollers.  After about 10 minutes I wiped the excess (which was very little) off of the chain and was ready to ride.


The No Drip Chain Luber did a very good job applying the necessary amount of lube to the chain using both thin and thick lubricants without a mess or dripping.  It made the task quick and easy, I used less lube and there wasn't a lot of excess to be wiped off afterward.  I now keep several No Drip Chain Lubers labeled with the lube they contain so I can use which ever one I desire depending on the conditions or bike.  No dripping on the concrete in the garage or on my wheels/chainstay were a welcome change from the old method of lubing my chains. 

The No Drip Chain Luber is available from Penn Cycle and other fine bike shops for $8.99.

Disclosure:  Finish Line provided the review samples for this article, but offered no other form of compensation for this review.